On a new install there will be a NAT implementation similar to:

This network is fine for general VM usage and will allow the VMs to obtain Internet access from the host Internet connection which it’ll share. However, as there is a NAT it means the VMs are not on the same network as the host. In order to have the VMs on the same network as the host a bridged setup needs to be created.
Launch terminal and run command:
ls /sys/class/net
The command lists the network interfaces on a system. An example from one of my computer’s is: enp6s0f3u1u4 (Ethernet) lo (loopback) virbr0 (the default NAT) wlp2s0 (WiFi).
A Bridge must be setup using an Ethernet interface (USB to Ethernet is fine) as WiFi is not supported.
My preferred configuration tool is nmtui since it is an easy text user interface launched in a terminal as a normal user or using root / sudo depending upon the Linux distro in use. An alternative would be to use nmcli or other utility that could create a Bridge.

Select Edit a connection and then select add. Should there already be connections used with your Ethernet card you may need to delete them first but be sure this is the case.

Select Add and press Enter


Configure a Bridge as follows:
1. Set Profile name as br0
2. Set Device as br0.
3. Untick enable STP, as it’s unlikely to be needed for a Virtual Machine Bridge setup and will remove the 30+ second boot up delay.
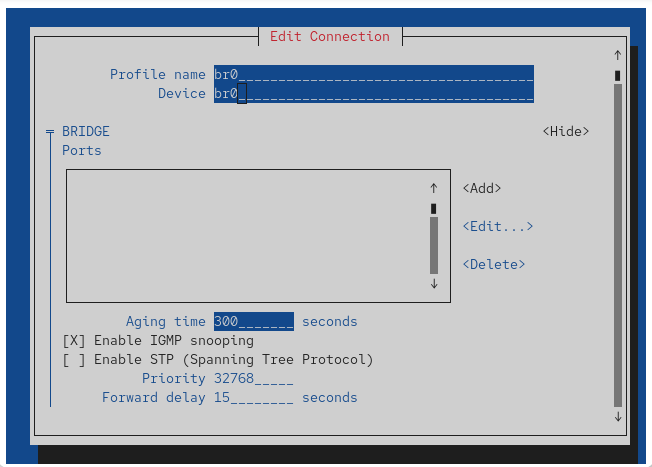
Select Add under Bridge Ports to setup the device that will be a Bridge Port. On my computer I chose to use enp6s0f3u1u4 and named the Profile / Device as below. Lastly choose OK to activate the new setup and quit nmtui.

To use the Bridge in a VM the NIC should be set as below for this example setup:

 port76.com | Welcome!